What is Migrations
Nov. 18, 2022 · 9 min read
Laravel is an open-source PHP framework built to develop web applications that aim to make the development process easier for developers. It takes care of common services in a project such as routing, authentication, sessions, and database. There are tons of perks to utilizing Laravel. However, in this article, we will focus on a particular feature that is tremendously useful in dealing with the database called Migrations.
What is Migrations?
Migrations, as the word implies, have something to do with movement from one place to another. In this case, it is about moving from a previous state of the database schema to a new one and vice versa. This means that it tracks and manages changes in the schema. Due to this, migrations is often associated with version control systems. Think of migrations as version control but for databases.
Migrations is an essential feature in Laravel. With it, developers can create-modify-drop a table, and/or add-modify-delete column in a database.
Why you need to use Migrations?
Within the development phase of your application, your database schema may change numerous times. Creating and modifying tables and columns by working with SQL files or database manager (like phpmyadmin) can be tedious and sometimes might cause accidents. For example, using PHPMyAdmin would require you to manually create tables and modify fields on both your local and remote server, increasing the likelihood that you would forget something and destroy your application. However, with migrations, this problem can be prevented since Laravel automatically does it for you. And lastly, migration allows you and your team to define and share the application’s schema with each other. This is because migration files are stored along with the application’s code. Especially if you are using git, your team will only need to fork or clone the repo and then migrate to set up their database.
Get started with Migrations
Generate a Migration File
Migration is a file that defines a table in a schema. It is by default found under database\migrations directory.
To create a migration file you simply do the command:
1
php artisan make:migration <name>
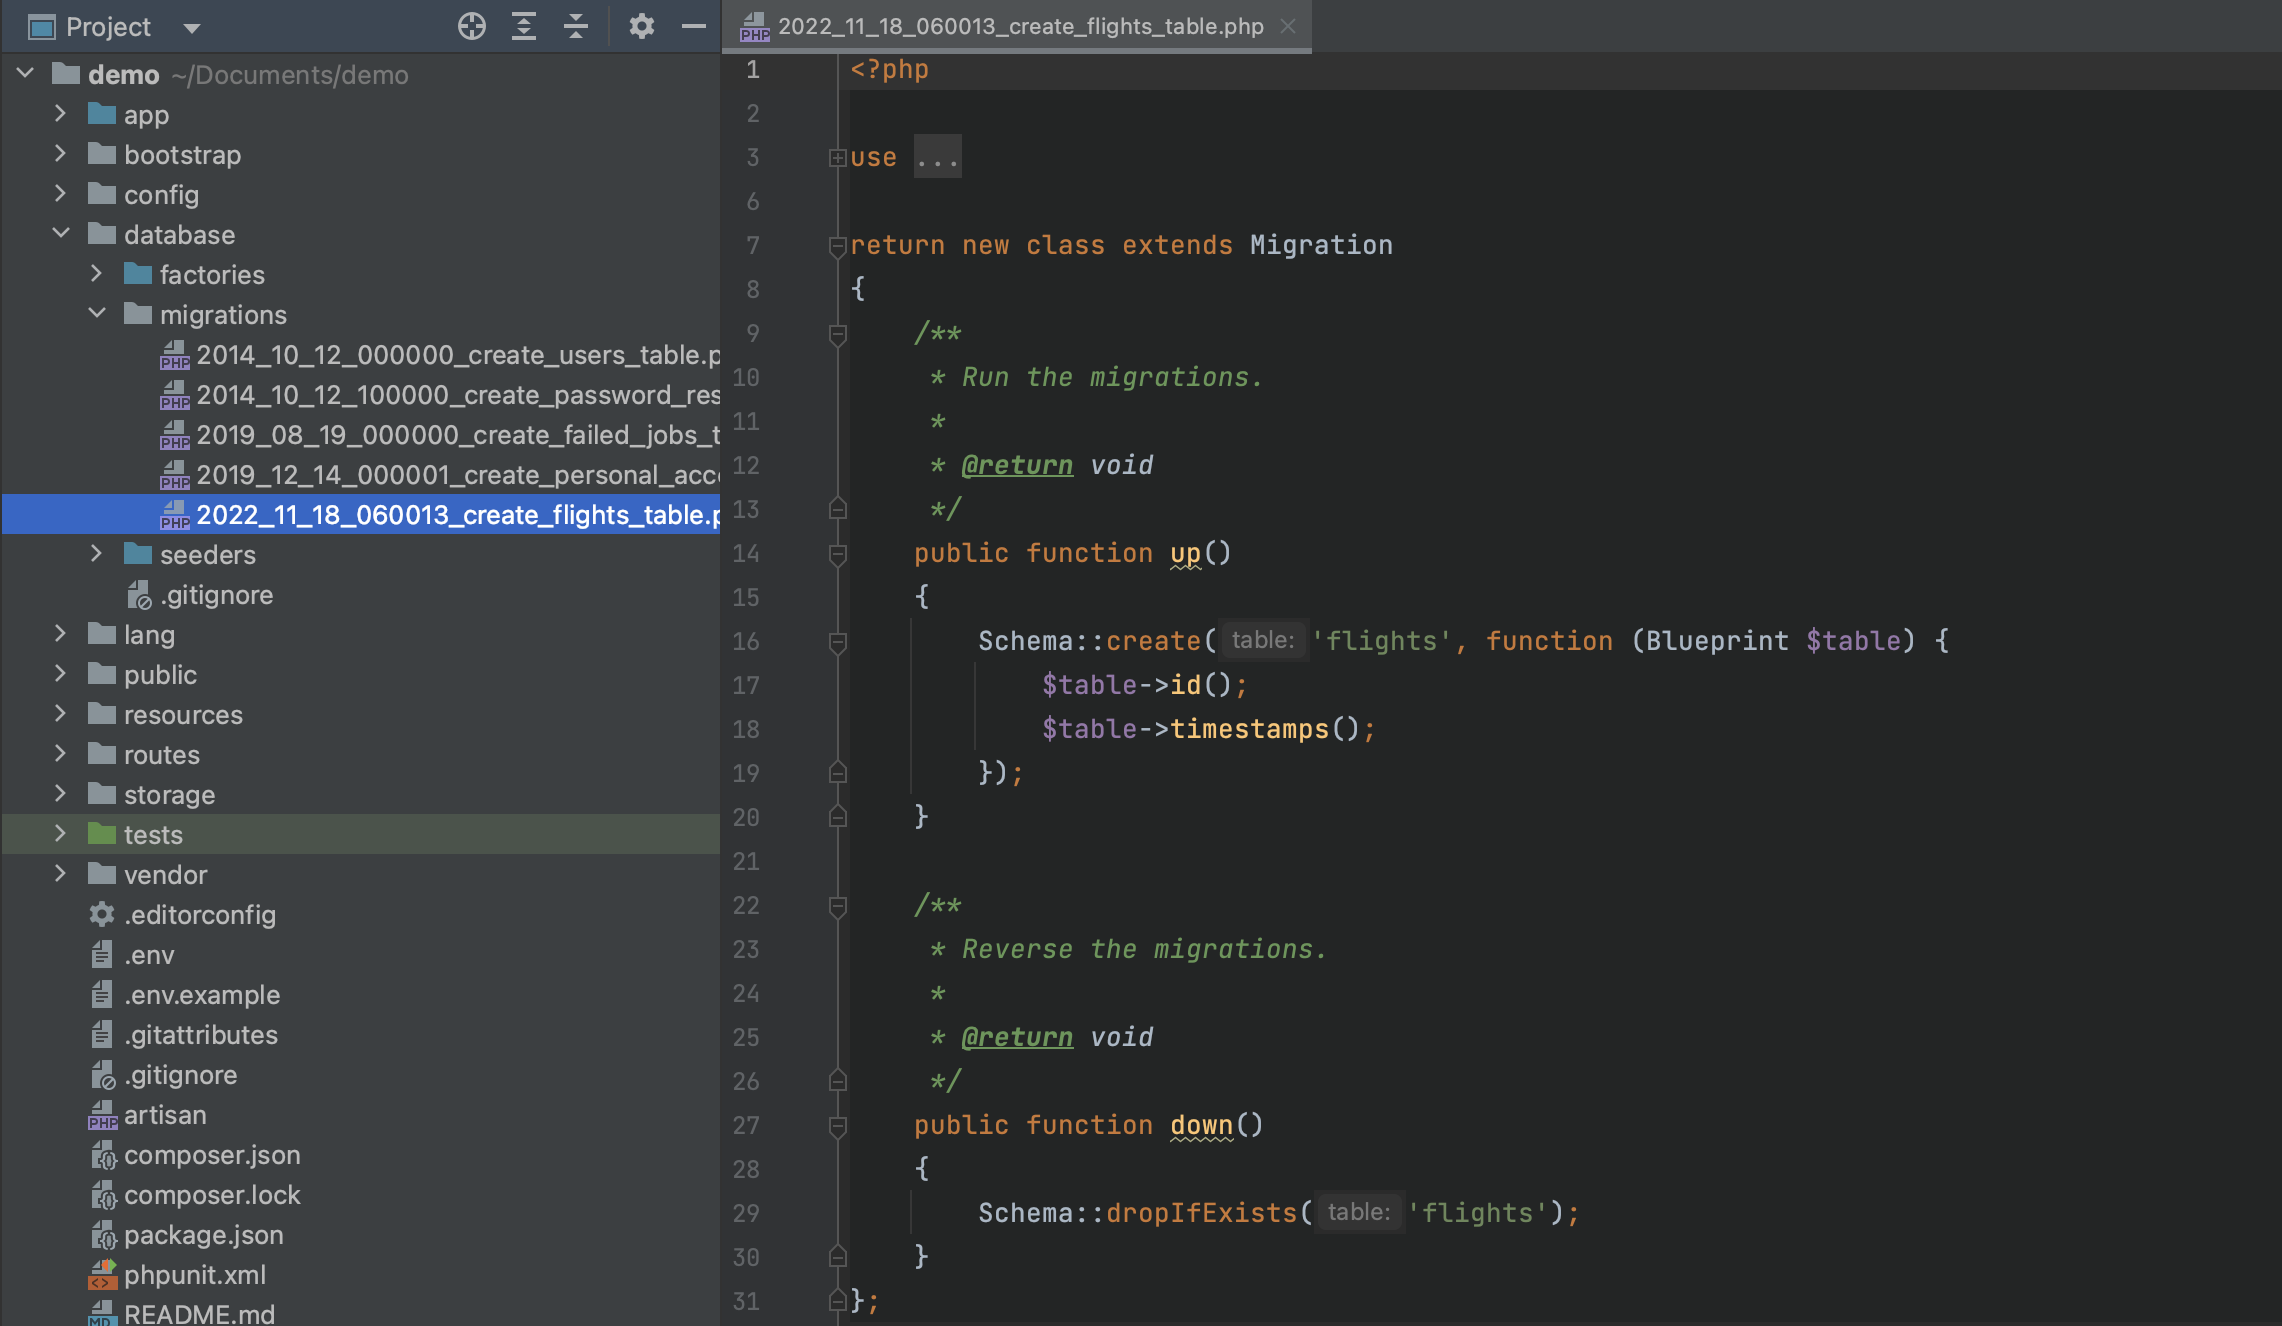
Note: Always give descriptive names to your files. For this example, we want to create a flights table thus the migration file is named ‘create_flights_table’.

In our newly created migration file, we observe that it has generated a class with two methods: up and down. The up method is used to define and add new tables, fields/columns or indexes in the database, while down method reverses operations executed in the up method.
Run and Rollback Migration
To run a migration we need to use the command:
1
php artisan migrate
This command publishes all our schema to the database. This command also creates the table in the database.
For rolling back latest migration we have command:
1
php artisan migrate:rollback
This command reverses the last migration batch.
To rollback and migrate with a single command:
1
php artisan migrate:refresh
This will roll back all your migrations and then migrate
For dropping all tables in the database and then execute migrate use this command:
1
php artisan migrate:fresh
Tables
Create Table
Use the create method to create a new database table.
The create function takes two arguments: the name of the table as the first parameter, while the second is a closure which receives a Blueprint object that may be used to define the new table:

Check if Table and/or column exists
The hasTable and hasColumn methods can be used to determine whether a table or column is present.

Update Table
To add/update a column in an existing table we need to generate a similar migration file to what we have created while creating the migration. The only change would be the migration name which should be descriptive. Like for example:
1
php artisan make:migration update_name_column_in_contacts_table
For adding a new column/field, we need to use the table method which also possess the same two arguments as create method. This also applies when modifying a table.

Here are common column types:
| Column Types | Description |
|---|---|
| bigIncrements() | creates a primary key with auto-increments of unsigned BIGINT |
| id() | is an alias for bigIncrements() method |
| boolean() | creates a BOOLEAN column |
| string() | creates a VARCHAR equivalent column |
| timestamp()s | creates a TIMESTAMP equivalent column |
| rememberToken() | creates a nullable, VARCHAR(100) equivalent column that is intended to store the current "remember me" authentication token |
| integer() | creates an INTEGER equivalent column |
| enum() | creates a ENUM equivalent column with the given valid values |
| float() | creates a FLOAT equivalent column |
| foreignId() | creates an UNSIGNED BIGINT equivalent column |
To check other available column types in Laravel: Column Types in Laravel
Renaming / Dropping of Table
To rename an existing database table, use the rename method which takes two arguments: from and to.

To drop an existing table, you may use the drop or dropIfExists methods which takes an argument of table_name.

Columns
Column Modifiers
Column Modifiers are a predefined function found in LARAVEL Migration that allows you to do things like set a column’s default value, make any column nullable, and more.

To check for other available modifiers in Laravel: Column Modifiers in Laravel
Modifying Column
The doctrine/dbal package has to be installed using the Composer package manager before you may change a column. It is used to determine the current state of the column and to make the SQL queries necessary to make the requested changes to a column:
1
composer require doctrine/dbal
If you want to also modify columns created using the timestamp method, you must add the following configuration to your application’s config/database.php
1
2
3
4
5
'dbal' => [
  'types' => [
    'timestamp' => TimestampType::class,
  ],
],
Updating Column Attributes
You may alter the type and properties of preexisting columns using the change method.
For instance, you want to increase the size of a string column.
Let’s make the string size of name column to 50 to demonstrate how the change method works.
To do this, we just declare the column’s new state and then invoke the change method:

Renaming a Column
In renaming a column you simply need to use the renameColumn method which takes two arguments from and to;

Dropping a Column
To drop a column,use the dropColumn method which takes an argument of the column name. If you want to drop multiple columns at once then you must enclose them with square brackets (an array).

Indexes
Adding Indexes
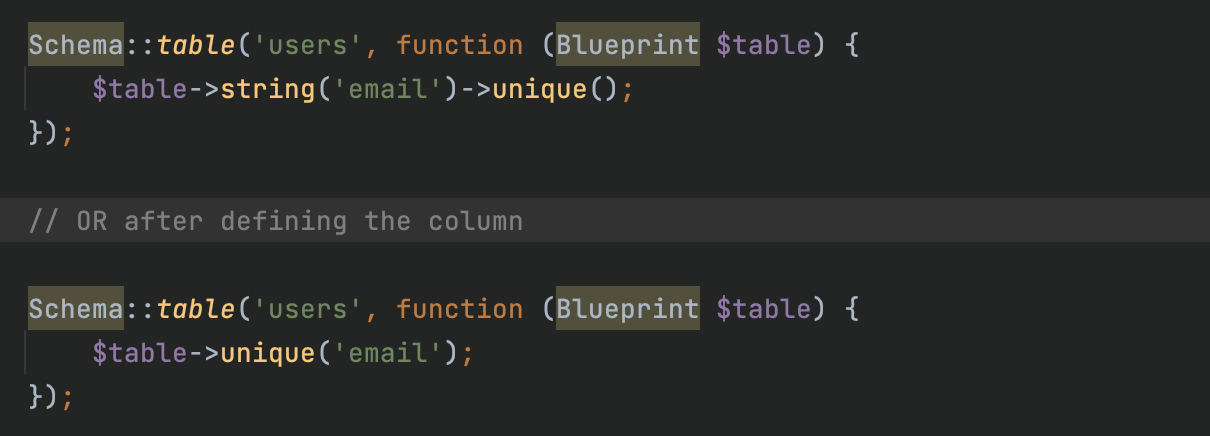
To add an index unique into the column email, we need to chain the unique method onto the column’s definition. Alternatively, if you want to create index after defining the column you can simply call the unique method on the schema builder blueprint.

Laravel will automatically generate the index’s name. However, you may pass a second argument to customize index name.

Laravel supports various types of indexes. Check this link for further info: Available indexes in Laravel
Renaming Indexes
To rename an index, use renameIndex method. It takes two arguments: from and to.

Dropping Indexes
For dropping an index you can use dropIndex method. For example:

Foreign Keys
Foreign Key Constraints
Foreign key constraints, which are used to impose referential integrity at the database level, are also supported by Laravel.
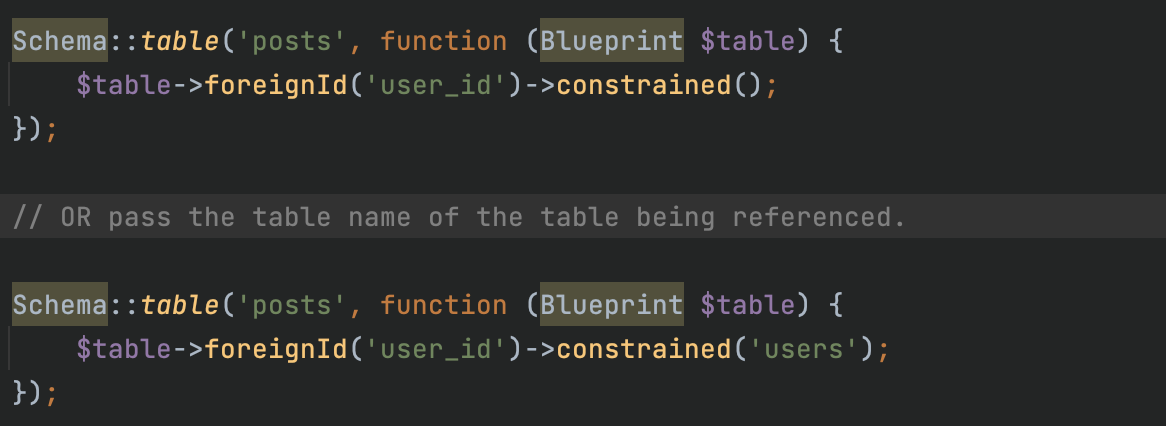
To create a foreign key column, use the foreign method which takes a string for its column name chained with references with the column name of the referenced table. And lastly, chained by on method which takes the referenced table name.

Another way is to use the foreignId which takes on the same name of the column referenced from the other table and then chained by the constrained method which automatically determine the table and column being referenced. Or you can also pass the referenced table name.

You may also chain various actions for the on delete and on update properties of the constraint.

Here are alternatives for these actions:
| Methods | Description |
|---|---|
| cascadeOnUpdate() | Updates should cascade |
| restrictOnUpdate() | Updates should be restricted |
| cascadeOnDelete() | Deletes should cascade |
| restrictOnDelete() | Deletes should be restricted |
| nullOnDelete() | Deletes should set the foreign key value to null |
Note: Column modifiers must be called before constrained method.
Dropping Foreign Key
To drop foreign key, use dropForeign method and pass the name of the foreign key constraint to be deleted
or pass an array containing the column name of the foreign key.

Toggle Foreign Key
To enable and disable foreign key follow methods:

Difference between Migrations and Seeding
Seeding is a utility provided by Laravel to automatically add dummy data to the database. Using the database seeder, developers may easily add test data to their database table. It is quite helpful since it enables developers to find faults and improve efficiency by testing with different data kinds. On the other hand, as mentioned earlier, using migration you can build a table in your database. The database schema for the application can be changed and shared easily within your team.